Well, I made it! Twelve goodies before Christmas - I started to think it wouldn't be possible because with the snow storm on Thursday, we lost our power allllll day long. But, I kicked it into high gear on Friday to make sure I completed it. Thank goodness! :)
Since we're heading out of town my husband and I celebrated Christmas with our boys yesterday and today. They loved all their gifts and all of the special things that go along with Christmas. One of my favorite traditions is to make a birthday cake for Jesus (which the boys helped with this year!) just to keep the focus on what's really important this time of year . . . The birth of our Savior. The birthday cake tradition is one I grew up with, and I love sharing that with the boys. It's a wonderful feeling to keep a tradition like that going, and thinking that maybe someday the boys will be doing the same with their families, too!
This last goody is a quick bread, and it's perfect if you have leftover eggnog from a party or family gathering . . . Or if you're the only one who likes eggnog but can't drink the entire thing yourself. Even if you don't like eggnog, I think you'll enjoy this bread - the eggnog doesn't stand out as a flavor (although you could certainly use it to make a glaze with some powdered sugar), but just adds a delicious, rich, background flavor. It's perfect for breakfast or to have on your cookie tray.
Eggnog Quick Bread (original recipe found here)
1/2 c. butter, melted
1/2 c. vegetable oil
2 eggs
2 c. sugar
2 c. eggnog
2 tsp. vanilla
2 Tbls. Southern Comfort (optional)
1/2 tsp. nutmeg
2 tsp. baking powder
2 tsp. baking soda
4 c. flour
1. Preheat oven to 350 degrees and grease 2 9x5 pans, or 1 9x5 pan and 4 mini pans.
2. Whisk together all ingredients but the flour until thoroughly combined.
3. Stir in flour until just combined.
4. Evenly distribute batter among the pans and bake larger loaves 45-50 minutes, and smaller loaves 25-30 minutes, or until golden brown and a toothpick comes out clean. Allow to cool 10 minutes in pan before turning out onto a cooling rack.
Usually during my Christmas baking I make chocolate dipped coconut macaroons, but this year I didn't feel like scooping out the individual cookies, baking them, then dipping them. However, my youngest brother loves those cookies, so I knew I still wanted to make something with chocolate and coconut.
These bars are easy. They are chewy. They have chocolate and coconut. They. Are. Amazingly delicious. They're one of those bars that I could keep eating and eating despite how full I feel. Dangerous, I know. But seriously, they come together so quickly and are so yummy - you won't be disappointed.
Better-Than-Mounds Bars (original recipe can be found here)
1 3/4 c. graham cracker crumbs
1/2 c. butter, melted
1/3 c. sugar
7 oz. sweetened flaked coconut
14 oz. can sweetened condensed milk
1 1/2-2 c. semi-sweet chocolate chips (depending on how chocolate-y you want them)
1 Tbls. peanut butter
1. Preheat oven to 350 degrees, line a 9x13 pan with foil, and grease it.
2. With a fork, mix together graham cracker crumbs, butter, and sugar. Evenly and firmly press into pan. Bake 10 minutes.
3. Meanwhile, stir together coconut and condensed milk. Carefully spread over baked crust, and place back in the oven to bake 15 minutes. Allow to cool.
4. Melt chocolate chips and peanut butter together, and spread over cooled bars. Place in the fridge for 1/2 an hour to set up.
Apparently these bars are a knock-off of what they serve at Starbucks. I've never tried them there, but I can say that these might be my favorite goody so far. They are so delicious and decadent and easy to put together that I know I'll definitely be making them even when the Christmas season is over.
Cranberries aren't used very often (at least in my baking), but you'd definitely miss them if you left them out of this recipe. They pair so perfectly with the white chocolate that it's become a new favorite flavor combination of mine. What? Me? Venturing away from chocolate/peanut butter? I know, I know . . . But these are totally worth it. And the white chocolate cream cheese frosting puts them over the top!
Cranberry Bliss Bars (original recipe can be found here)
1 c. butter, melted
2 c. brown sugar
2 eggs
3 tsp. vanilla
1/2 tsp. salt
2 c. flour
1 1/2 c. white chocolate chips
1 c. dried cranberries
1/2 tsp. orange zest Frosting
4 oz. cream cheese, softened
1 c. white chocolate chips, melted
2 c. powdered sugar
1/3 c. dried cranberries, chopped into smaller pieces
1. Preheat oven to 350 and line a 9x13 pan with foil and grease it.
2. Mix together butter, brown sugar, eggs, vanilla, and salt until thoroughly combined.
3. Stir in flour, white chocolate chips, cranberries, and orange zest.
4. Spread evenly in prepared pan, and bake 25-30 minutes, or until the top is light golden brown. Allow to cool.
5. For frosting, beat cream cheese with about 3/4 of the melted white chocolate (just eyeball it).
6. Add the powdered sugar, and beat for 3-4 minutes until light and fluffy. Spread over cooled bars, and sprinkle chopped cranberries over the top. Use a fork to drizzle the remaining white chocolate over the top of the cranberries. (Re-warm it in the microwave for 10-20 seconds if it's set up.)
These cookies use the warm spices of the season (like cinnamon and nutmeg), but kick it up by adding in graham cracker crumbs, chopped apples, and toffee. They're soft and just sweet enough with the white chocolate drizzle on top (you can certainly leave that off). They're traditional enough with the flavors, but those extra ones make them special for the season. Hope you like them!
Toffee Apple Pie Cookies (original recipe can be found here)
1/2 c. softened butter
1/2 c. shortening
1 c. brown sugar
1/2 c. sugar
2 eggs
2 tsp. vanilla
2 tsp. baking powder
1 tsp. salt
2 2/3 c. flour
1 c. graham cracker crumbs
1 tsp. cinnamon
1/2 tsp. nutmeg
1 c. finely chopped apple (I used Granny Smith)
1 c. toffee pieces (not chocolate covered)
1/2 c. white chocolate chips
1 tsp. vegetable oil
1. Preheat oven to 350 degrees, and line baking sheets with parchment paper.
2. Cream together butter, shortening, and sugars.
3. Add in eggs, vanilla, baking powder, salt, cinnamon, and nutmeg, and beat again.
4. Stir in flour and graham cracker crumbs until just combined, then stir in the apple and toffee pieces.
5. Drop dough by Tbls. onto prepared sheets and bake 10-12 minutes. Allow to cool.
6. Melt white chocolate with vegetable oil, and use a fork to drizzle over the cookies. Allow the chocolate to harden before storing.
The name is a mouthful, but it's totally worth it for these cookie bars. They're so gooey and delicious it's almost impossible to stop eating them. Thanks to Brown Eyed Bakerfor the recipe idea!
I used my own chocolate chip cookie dough recipe, and since I was using a 9x13 pan I used an entire 14 oz. bag of caramels instead of 11 oz. as the original recipe calls for in an 8x8 pan. I thought there was still plenty of caramel flavor and texture without fully doubling the caramel called for, but feel free to use 22 oz. instead of 14, if you want. Also, to make this recipe even easier, you can use store-bought cookie dough. I'd use two packages, one for the bottom crust, one for the top, if you're using a 9x13 pan.
I think this recipe would be really versatile, too - it would be excellent with peanut butter cookie dough, or oatmeal chocolate chip, or even sugar cookie dough. I love recipes that I can easily change up for a delicious treat!
Salted Caramel Chocolate Chip Cookie Bars
1 c. melted butter
1 c. brown sugar
1 c. sugar
2 eggs
2 tsp. vanilla
1 tsp. salt
1 tsp. baking soda
3 1/2 c. flour
1 1/2-2 c. chocolate chips
14 oz. bag of caramels, unwrapped
2 Tbls. milk or cream
1. Preheat oven to 325 degrees, and grease a 9x13 pan.
2. Stir together melted butter, and both sugars until smooth.
3. Stir in eggs, vanilla, salt, and soda.
4. Stir in flour until just combined, and then stir in the chocolate chips.
5. Spread half the dough in the prepared pan.
6. Melt together caramels and milk until smooth. Pour over dough in the pan.
7. Use the rest of the cookie dough to spread over the top of the caramel, doing your best to make sure all the caramel is covered.
8. Bake about 45 minutes, until the edges are golden brown, and the top is lightly browned. Allow to come to room temperature, then refrigerate for about half an hour before cutting.
One of my favorite cookies is the peanut butter cookies that are rolled in sugar and have a Hershey's kiss pressed into the center or a chocolate star. For probably the gazillionth time, I love the peanut butter and chocolate combination. These cookies were a fun twist on that traditional cookie.
The dough is chocolate with a hint of peanut butter, and originally you were supposed to form the dough around a small ball of peanut butter/powdered sugar. Well, I didn't feel like being quite that putzy with it, so I rolled the chocolate dough in sugar, baked the cookies, and when they came out of the oven I pressed my thumb into the center and filled it with the peanut butter filling. The result was delicious, and I have a feeling this will be a popular cookie with my hubby and sibs, who all seem to love chocolate/peanut butter, too!
You can always use a peanut butter kiss to press into the center, too, or any other small piece of chocolate you think would be yummy.
Chocolate Peanut Butter Surprise Cookies (original recipe can be found here)
1/2 c. butter, softened
1/2 c. sugar, plus extra for rolling
1/2 c. brown sugar
1 c. peanut butter, divided
1 tsp. vanilla
1 egg
1/2 tsp. baking soda
1/4 tsp. salt
1/2 c. unsweetened cocoa powder
1 1/2 c. flour
1/2 c. powdered sugar
2-3 Tbls. milk
1. Preheat oven to 350 degrees and line a baking sheet with parchment paper.
2. Cream together butter, both sugars, and 1/2 c. peanut butter.
3. Add vanilla, egg, baking soda, and salt, and beat again.
4. Slowly stir in cocoa powder and flour.
5. Form dough into 1 inch balls and roll in regular sugar. Flatten slightly with the bottom of a glass and bake 7-9 minutes.
6. Immediately after removing them from the oven, make an indentation in the center of the cookie with your thumb (careful, they're hot!) or the handle of a wooden spoon. Allow to cool.
7. Beat together powdered sugar, remaining 1/2 c. peanut butter, and milk until smooth. This will be thick. Pipe or spoon a blob into the center of each cookie and press slightly with your finger to make it smooth.
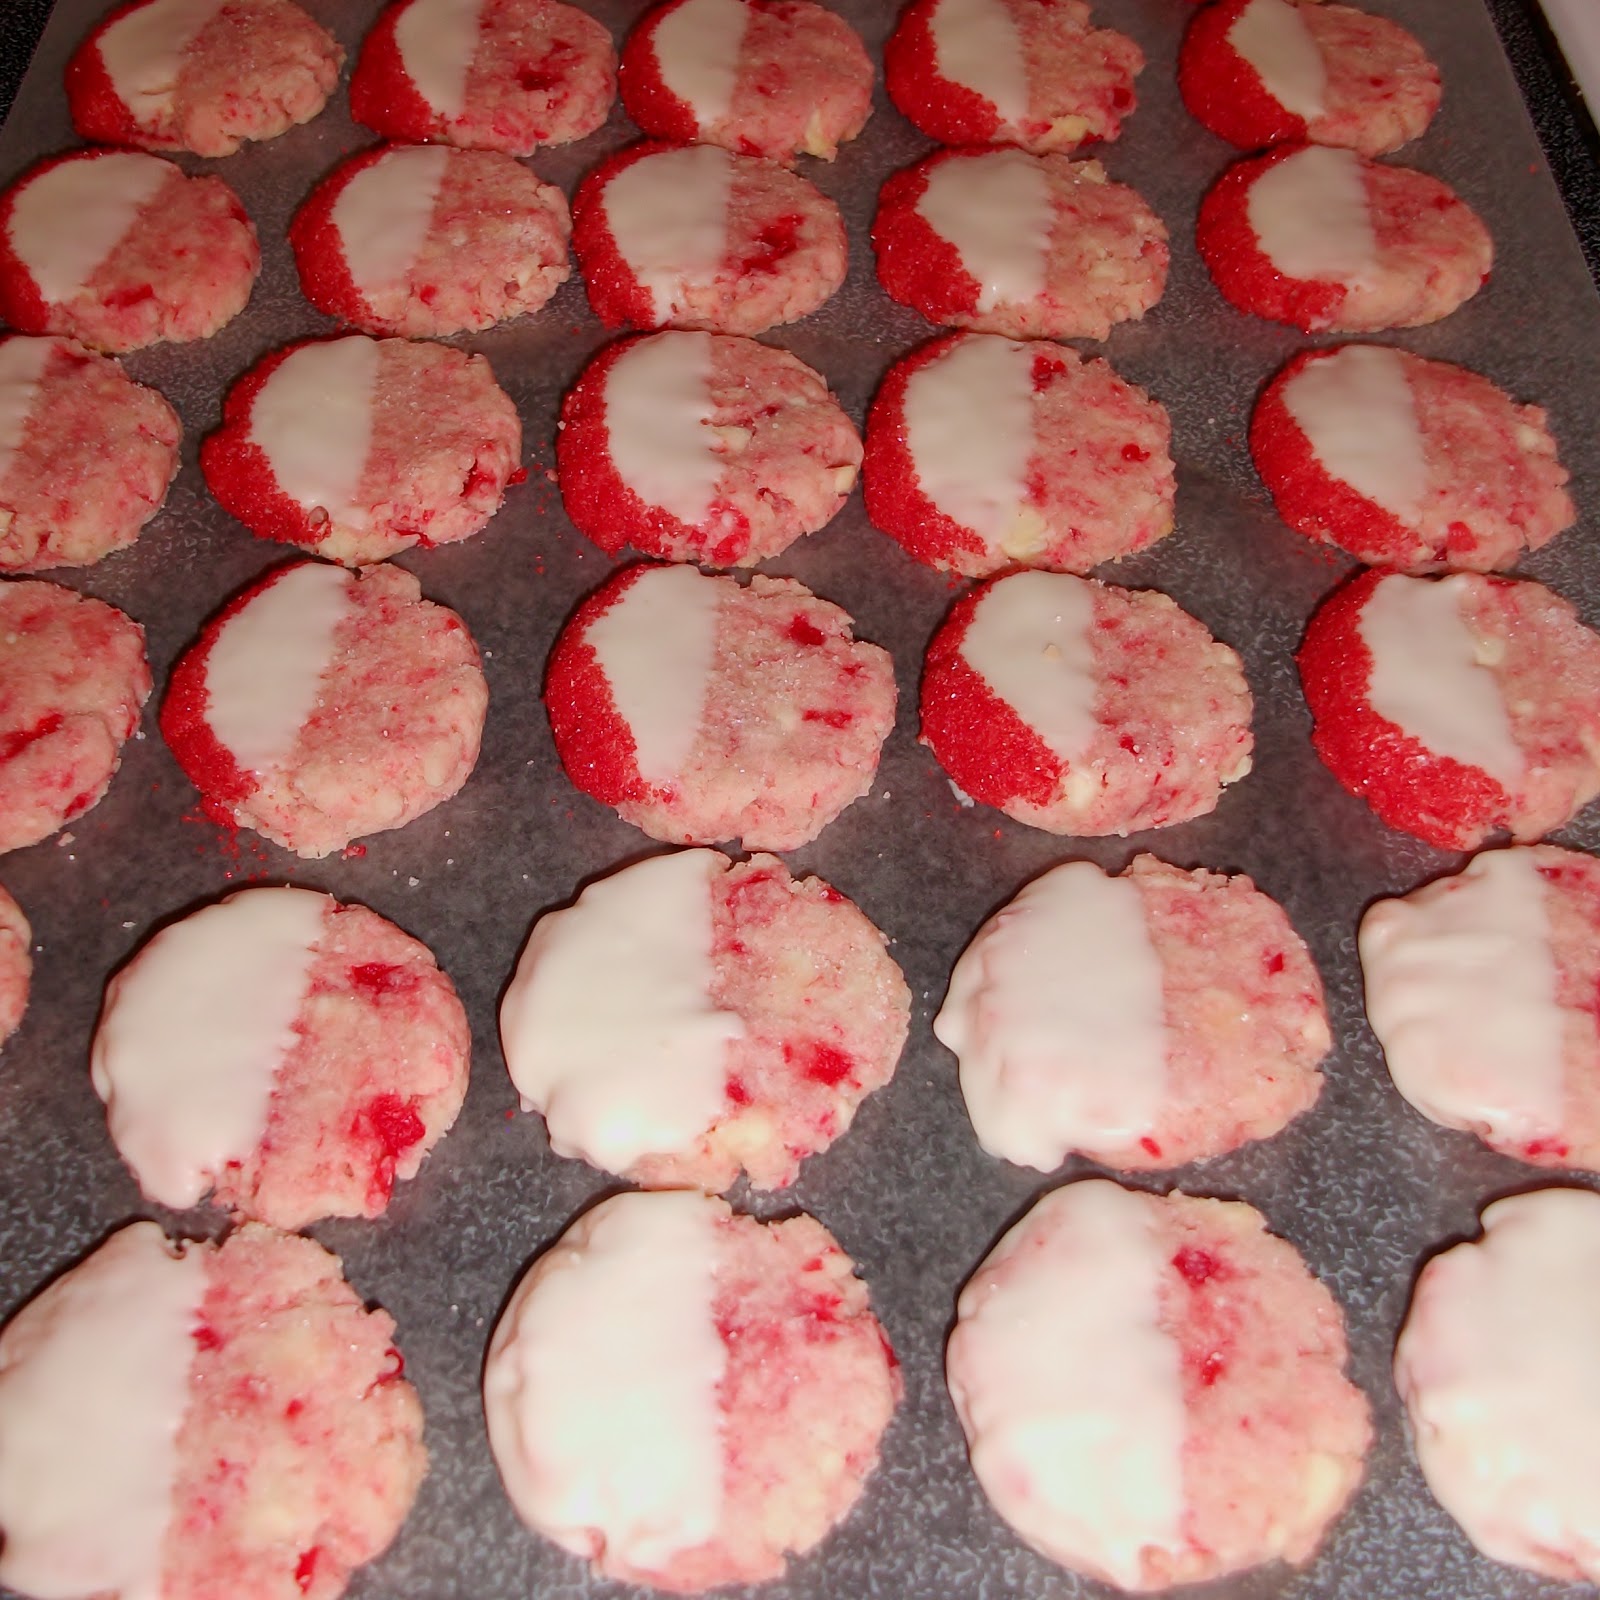
This recipe was "pinned" as one of the best Christmas cookie exchange recipes on Pinterest, so I figured I better give it a whirl. It didn't hurt that the name made them sound delicious, and they're such a pretty color!
When I made the dough, it was really crumbly at first but came together a little better after some kneading. I was worried that the cookies would just be too crumbly and fall apart, but that wasn't the case at all. They stayed nicely formed while they baked, and were actually quite sturdy! They'd make a great traveling cookie, and they taste amazing; it's nice to have a cookie that's a little out of the ordinary and this one is exactly that.
White Chocolate Cherry Shortbread (original recipe can be found here)
1/2 c. maraschino cherries, drained and finely chopped
2 1/2 c. flour
1/2 c. sugar
1 c. cold butter
1/2 tsp. almond extract
12 ounces white chocolate chips (chop up 2/3 c. to use in the dough)
1-2 tsp. vegetable oil
sprinkles or edible glitter, optional
1. Preheat oven to 325 and line a cookie sheet with parchment paper.
2. Mix together flour and sugar, then cut in butter with a pastry blender until fine crumbs form.
3. Stir in almond extract, chopped cherries and chopped white chocolate chips. Knead dough until it comes together in a ball.
4. Drop dough by Tbls. onto prepared sheet, and flatten using the bottom of a glass dipped in sugar.
5. Bake for 10-12 minutes, until cookies are set in the center. Allow to cool.
6. Melt remaining chocolate chips and vegetable oil until smooth. Dip half the cookie in chocolate and the edge in sprinkles, if desired. Set on wax paper to cool and set.
Ginger cookies tend to be a Christmas cookie staple, but many of them can leave you underwhelmed as far as flavor and texture go. Not so with these cookies - they are soooo soft, and the flavor is deep and rich from the combination of molasses, cinnamon, and ginger. If you think you don't like ginger cookies, I highly recommend giving these a try.
Half of the cookies I rolled in sugar before baking, and the other half I frosted with vanilla frosting after they had cooled. They're delicious both ways, and the recipe makes a lot (I got 80 cookies!) which is a plus if you want to hand them out to family and friends . . . or if you're doing 11 cookie trays, like I am. :)
Soft Ginger Cookies (recipe from Betty Crocker Cookbook)
1 c. sugar
3/4 c. sour cream
1 c. butter, softened
1/2 c. molasses
1 egg
1 1/2 tsp. baking soda
1 tsp. cinnamon
1 tsp. ginger
1/2 tsp. salt
3 c. flour
1. Preheat oven to 375 degrees and line a cookie sheet with parchment paper.
2. In a large bowl, beat sugar and butter until creamy, about 2 minutes. Scrape down bowl.
3. Add sour cream, molasses, egg, baking soda, cinnamon, ginger, and salt, and beat again, 3-4 minutes.
4. Stir in flour until just combined.
5. Drop dough by Tbls onto prepared cookie sheets. Roll in sugar if desired. Bake 9-11 minutes, or until cookies are set. Let cool on pan for a couple minutes, then move to cooling racks to cool completely.
*I used my basic buttercream recipe to frost my cookies, but use whatever you like best! Vanilla Buttercream
1/2 c. butter
1/2 c. shortening
4 c. powdered sugar
1 Tbls. vanilla
2-3 Tbls. milk
1. Beat together butter and shortening until light and fluffy, 3 minutes.
2. Slowly add powdered sugar and beat on med.-high speed for 5 minutes.
3. Beat in vanilla and milk.
You can't do holiday treats without including something with peppermint - it captures the season like few other flavors can. Peppermint isn't usually my favorite flavoring, but when it's mixed with chocolate it takes on a whole different flavor.
The wonderful thing about these cookies is how absolutely light and airy they are. They're like crisp puffs of air with a light peppermint taste complemented by the light dip in chocolate. You can drizzle chocolate over the tops if you prefer, instead of dipping; and, if you don't want to pipe the meringues, you can certainly just drop them by Tbls. onto the baking sheet and they'll be just as lovely and delicious.
Mint Meringue Kisses (original recipe can be found here)
4 egg whites, at room temperature
1/2 tsp. cream of tartar
1/2 tsp. salt
1 1/3 c. sugar
1/4 tsp. peppermint extract
6-7 drops of green food coloring
1 c. semi-sweet chocolate chips
1 tsp. vegetable oil
1. Preheat oven to 225 degrees, and line 2 baking sheets with parchment paper - do not grease.
2. Combine egg whites, cream of tartar, and salt in a mixer and use the whisk attachment to whisk on high until soft peaks form, 2-3 minutes.
3. Add sugar 1 Tbls. at a time, and continue beating until stiff peaks form, another 2-3 minutes.
4. Beat in peppermint extract and food coloring.
5. Using a large star tip, pipe 1 inch stars on the parchment paper, leaving about 1 inch between each one.
6. Bake for 1 hour, turn the oven off, and leave the pans in the oven for another hour until they're cool and dry.
7. Melt together chocolate chips and vegetable oil, and drizzle over top of meringues, or dip tops in it. Allow chocolate to cool and set.
What's Christmas without a little decadence? These brownies are scrumptious, creamy, and fudgy. Yummmm. Everything's better when cream cheese is involved, and when it's mixed with chocolate and raspberry? Well, its perfect.
I made the recipe easier by using a boxed brownie mix, but feel free to use your favorite recipe! I found this recipe over at Bakers Royale. Raspberry Cheesecake Brownies
1 box brownie mix, and ingredients called for on the box Filling
1 8 oz. pkg cream cheese
1/3 c. sugar
1/4 c. raspberry puree or raspberry jam (I used jam)
1 egg
1/2 tsp. vanilla
1/4 tsp. salt
3 Tbls. flour
1 pt. fresh raspberries, optional Glaze
1/4 c. raspberry jam
1/3 c. powdered sugar
1. Preheat oven to 350 degrees and line a 9x13 inch pan with parchment paper.
2. Prepare brownie batter according to package directions and pour 2/3 into prepared pan.
3. Beat all filling ingredients together (except fresh raspberries, if using) until light and fluffy, 3-4 minutes.
4. Carefully spread cream cheese filling over brownie batter, and dollop the rest of the brownie batter on top of it. Gently swirl using a knife to create a marbled effect. Press raspberries into the top, if using.
5. Bake 45 minutes, or until set. Allow to cool completely.
6. Warm raspberry jam in the microwave for 30 seconds, and whisk in powdered sugar. Drizzle over the top of the bars.
These tender cookies are sure to be a hit on your holiday cookie tray. Unlike some cookies, these aren't overly sweet. They have a hint of orange, and the drizzle of chocolate on the top hits just the right note for sweetness and flavor combination. This was a new recipe for me this year, and it's one I'll be sure to return to and use again.
I love the combination of chocolate and orange (i.e. those chocolate oranges that you smash and then eat the segments), but if you're not a fan, feel free to leave out the orange zest and substitute almond or vanilla extract. Even peppermint extract might be a nice touch! I used milk chocolate for the drizzle, but if you like semi-sweet or bittersweet, or even white chocolate, go with it! You can adapt this cookie many different ways to suit your tastes.
Buttery Orange Cookies with a Chocolate Drizzle (recipe slightly adapted from Taste of Home Christmas Cookies 2012)
1 c. softened butter
1/2 c. powdered sugar
1 tsp. orange zest
1 tsp. orange extract
1/4 tsp. salt
2 c. flour
1/2 c. sugar
1/2-3/4 c. chocolate chips (I used milk chocolate, but you can use your favorite)
1. Preheat oven to 350 and line baking sheets with parchment paper.
2. Cream butter and powdered sugar until light and fluffy, 2-3 minutes.
3. Beat in zest, extract and salt.
4. Add flour and mix until combined - this is a stiff dough.
5. Drop dough by Tbls. onto prepared baking sheet. Dip tops of dough in sugar, and flatten slightly with the bottom of a glass.
6. Bake cookies 10-12 minutes, or just until set - they shouldn't be brown.
7. Once cookies have cooled, melt chocolate chips, and use a fork to drizzle the chocolate over the tops of the cookies. Alternately, you could dip half the cookie in chocolate, although you'll need more chocolate chips for this.
8. Place in the fridge or freezer until chocolate sets and hardens - 20-30 minutes.
It's that time of year again when I get a little more baking-crazy than usual (which is saying something) and I couldn't be more excited! I love Christmas-time and all that goes along with it - decorations, lights, Christmas church services, Christmas programs (Asher's in his first one this year!), and baking!
*I don't know if I'll get 12 days in a row, but I'll be sure to get ya 12 goodies before Christmas! Hmm . . . I guess I left it a little late this year . . . Surprise, surprise.
The first recipe is an old stand-by that's not just good for Christmas, but year-round. It's a crowd-pleaser every time, the bars are easy to throw together, and the recipe makes a lot! Can't go wrong!
Monster Bars (recipe from my mom)
1/2 c. butter, softened
1 c. brown sugar
1 c. sugar
3 eggs
1 tsp. vanilla
2 tsp. baking soda
1 1/2 c. peanut butter (you can use crunchy or smooth; I prefer smooth)
4 1/2 c. oatmeal
1 c. chocolate chips
1 c. M&Ms (feel free to use the Christmas ones to make them festive!)
1. Preheat oven to 350 degrees, and grease an 11x17 pan.
2. Cream together butter and sugars until fully combined and fluffy - 2-3 minutes. Scrape down bowl.
3. Add eggs, vanilla, baking soda, and peanut butter and beat again until everything's smooth.
4. Slowly stir in oatmeal, chocolate chips, and M&Ms - you might need to do some by hand at the end to make sure it's all fully incorporated.
5. Spread in prepared pan, and bake 17-20 minutes, or until edges are light golden brown. You don't want to over-bake these because you want them to stay nice and soft and chewy.
Finally. I feel like I'm getting somewhere with this pregnancy. I know I still have 10 (probably 11) weeks left, but once I get to the thirties, the due date feels so much closer. And, I know the next month and a half will fly by because we have so much going on:
* this week is Thanksgiving
* the weekend after, my hubby and I are going to The Nutcracker (my bday present)
* the weekend after that is his brother's wedding (which I'm making the cake for)
* Asher's first Christmas program is the weekend after that
* then it's Christmas (not to mention all the shopping and baking that needs to get done in there)
* then New Year's, of course
* and then January will probably drag by for the most part until Aiden's 2nd birthday!
There's nothin' that perks up my spirit like spending time with family - and thankfully I'll get to do a lot of that coming up. Can you believe how close it seems? I can't. When I look at it like that, with everything laid out that's happening between now and baby-time, I know it's a lot closer than it seems.
Overall, I've been feeling pretty great - I've been tired a lot, but hey, who isn't? My back pain has gotten a little worse, but nothing too horrible yet. (Can't wait to schedule my pregnancy massage - I highly recommend getting one . . . It's pure bliss.) I've stayed relatively healthy - I had a cold that lasted a little over a week, but it could've been much worse. So, I'm counting my blessings and counting down until this little lady makes her appearance!
Hope you all have a wonderful Thanksgiving and eat your fill of delicious food . . . I know I will. :)
Fall baking means cinnamon, nutmeg, pumpkin, and . . . apples! I love apple desserts. (Although I hate peeling and slicing them.) One of my all-time favorites is Apple Crisp. I could probably eat an entire pan by myself . . . Who am I kidding? I did eat an entire 8x8 pan by myself over the course of two days! I'd blame it on pregnancy, but if I'm being honest that had nothing to do with it. I console myself in the fact that it's really just apples with a nice crunchy, almost granola-like, topping - totally healthy, right? Maybe not. I digress.
I love my mom's Apple Crisp. It's the perfect combination of tart apples and sweet crumble topping. When I asked for the recipe, she said she always uses the one straight out of her Betty Crocker Cookbook. Thankfully she gave me a copy as a wedding shower gift . . . Crisis averted! The recipe is so simple and delicious; you really can't go wrong. A dollop of whipped cream or ice cream wouldn't go amiss either. So, if you're in a fall-ish, apple-y, baking mood, give this recipe a whirl and I don't think you'll be disappointed. Just make sure someone else is around who's willing to eat it with you or you might find yourself staring at an empty pan wondering what the heck happened. :)
Apple Crisp (recipe from Betty Crocker)
4 c. (4 medium) Granny Smith apples, peeled and thinly sliced
3/4 c. brown sugar
1/2 c. flour
1/2 c. oatmeal
1/3 c. butter
3/4 tsp. nutmeg
3/4 tsp. cinnamon
1/4 tsp. salt
1. Preheat oven to 375 degrees, and grease an 8x8 inch pan
2. Combine sugar, flour, oatmeal, butter, nutmeg, cinnamon, and salt until well combined.
3. Spread apples in the bottom of the pan.
4. Sprinkle crumb topping evenly over apples.
5. Bake 30-45 minutes, depending on how firm you want your apples (I like mine soft, but not mushy, and 45 is just right for me). Eat warm with whipped cream or ice cream.
As I watch our two boys play together more and more frequently (and yes, sometimes fight), I realize how very important sibling relationships are. I love seeing how the boys connect and respond to each other even at such young ages.
Aiden is constantly copying everything Asher does, trying to be just like his big brother; Asher steps in a lot of times when Aiden's about to get scolded for something and says, "He's sorry, Mommy. He didn't mean to." It's one of my favorite things about having multiple children.
I grew up in a big family. I'm the second oldest of 6 - I have 3 sisters and 2 brothers, and I absolutely love family get-togethers. My favorite thing is when everyone is at my parents' house - and with five (going on six) grandkids plus significant others, it's definitely a full house!
As we've gotten older, we've definitely become closer as siblings - there comes a time when age really doesn't matter any more. I'm 10 years older than my youngest brother, and while he'll always seem young to me (he's the baby!), I can still hold the same conversations with him as I do with any of the others. I couldn't imagine not having any one of them around. I suppose that's really what prompted me to write this post.
I've watched friends/acquaintances/news stories of people who have loved ones in the army, and I've told my husband for literally years, that while I would be incredibly proud, I'm so glad that neither him nor any of my family is in the military. The added death risk terrifies me. I know it's not a rational thought because any one of us could die at any time, but the thought of them being in a war-zone, or something similar, makes me horribly nervous.
Well, my oldest younger brother, Jon, recently joined the army and leaves for basic training very soon; that's followed by training in his specified area, and then he'll go on tour somewhere. While I'm nervous, and sad that we won't be able to see him very often, I couldn't be more proud of his decision (but I won't lie and say I never tried to talk him out of it . . .). When he talks about being in the army, it's easy to see it's the right thing for him. And remembering him growing up, it's really not surprising that he chose this path. He once told my husband that he knows it's what he wants because when people ask him what he's doing and he tells them he's in the army, he can't help but smile. That's a reassuring feeling for all of us, I think.
No one in our family has ever been too far from home - my family lives the farthest away, and it's a little under three hours! It'll definitely be an adjustment for all of us, but I thank God for all those years we had to strengthen our sibling relationships.
I've always felt a special bond with Jon because I think we're pretty similar - we love reading, are kind of nerdy about it, and neither of us really outgoing. I'll miss him.
This song reminded me of how Jon might be feeling (that's he was "called" to do this), and also how my parents and the rest of the family are feeling about this new adventure. (It's far from perfect, but I hope you don't mind.) I've included the lyrics underneath because sometimes it's hard to hear over the piano . . . Just one of the flaws. With all my crazy pregnancy-emotions going on, I'm just glad I got through it without breaking down in tears! :)
It started out as a feeling
Which then grew into a hope
Which then turned into a quiet thought
Which then turned into a quiet word
And then that word grew louder and louder
Til it was a battle cry
I'll come back
When you call me
No need to say goodbye
Just because everything's changing
Doesn't mean it's never
Been this way before
All you can do is try to know
Who your friends are
As you head off to the war
Pick a star on the dark horizon
And follow the light
You'll come back
When it's over
No need to say good bye
You'll come back
When it's over
No need to say good bye
Now we're back to the beginning
It's just a feeling and no one knows yet
But just because they can't feel it too
Doesn't mean that you have to forget
Let your memories grow stronger and stronger
Til they're before your eyes
You'll come back
When they call you
No need to say good bye
You'll come back
When they call you
No need to say good bye
Well, I'm 26 weeks as of today - 3rd trimester!!! I find that impossible to believe. Some days I look down and I can't remember what it's like not to have a belly sticking out in front of me. Other days it's like, "Hey, when'd that happen?"
I can't really complain because everything's gone really smoothly so far. I've been really tired the past couple of weeks - tired, as in I could easily take a nap every day and happily be in bed by 10 p.m. . . . or earlier. I've also been getting annoyed with how I look. It goes this way for me with every pregnancy. Some days I think I look pretty cute, while other days I think I look like a gigantic whale. Lately it's been mostly "whale days." Oh well, it's part of my process I guess! And like I said, I really can't complain because both baby and I have been very healthy so far.
I've been wanting to put together a list of what I feel like I need to get through pregnancy, and while I'm sure I'm forgetting things (blame it on pregnancy brain) I think this mostly covers it:
* Sweatpants - I'm talking over-sized, soft, comfy sweatpants I can slip into without worrying that they won't fit anymore
* Black yoga pants - these aren't maternity, but they're stretchy enough that it doesn't matter; I can wear a sweater with them and still look decent enough to go out (yeah right, like I've been going "out")
* At least one cotton maternity top I can put on that can be casual if I want, or dressed up for work/church (I can use some of my regular tops throughout pregnancy, but maternity ones are longer and usually more flattering in the later months)
* Cardigans - I don't buy maternity cardigans because I don't button them so it doesn't really matter
* Maternity jeans - I can still get by using a hair tie with some of my jeans, but with maternity jeans I don't have to worry about the zipper coming down!
* Sweatshirts - you knew it was coming - I usually go for Dusty's because they're big and oh-so-soft
* Cute flats - if the rest of me can't look cute, at least my feet will!
* Chocolate - I haven't been craving it as much with this pregnancy, but when I do we better have some on hand or I'm making a special trip to the store just for that . . . which is dangerous because then I tend to overdo it when I'm there
* Water bottle - I usually get pretty thirsty and I like to have it on hand
* Apples and carrots/cauliflower with veggie dip (Dusty's grandma has the best home-made dill dip recipe, and using light mayo and light sour cream makes me not feel bad eating it with my veggies)
* Books - okay, I always need books, but when I'm having down days, I need my old stand-bys to sink into (i.e. I just started re-reading the Harry Potter series)
* A heating pad for my lower back when it starts to get sore
Things I would not buy again:
* A belly band - I bought one when I was pregnant with Asher so I could stay in my regular jeans longer and it did nothing. It wasn't nearly tight enough and it was one-size-fits-all. Maybe they've modified them since then, though
* Mid-belly maternity pants - I bought a pair that were a super good deal for this pregnancy and I hate them. Most uncomfortable thing I have ever put on.
I haven't bought a pregnancy pillow or any special sleeping stuff because I don't usually have much trouble sleeping, but some women swear by them!
As I said, I'm sure I'm forgetting things, but that's a pretty good start.
Sometimes I have a great idea for a recipe and am so excited to make it that I don't check the ingredients I have on hand first. Sometimes it's a disaster. Other times, it turns into a scrumptious treat that becomes a family favorite! The latter is what happened with this recipe, thankfully.
I had a craving for those little peanut butter cookies that have a Snickers hidden on the inside, but didn't feel like going through the work of rolling each individual ball. So, I went to my go-to, all-time-favorite, Peanut Butter Cookie recipe. I thought I would just chop up the fun-size Snickers I "knew" we had on hand and stir them into the batter . . . Well, as it turned out there were only 4 left! (I have no idea how that happened - it's like we have an uncontrollable, chocolate-craving, pregnant lady in our house or something.) Clearly 4 measly little pieces would not be enough for an entire pan of bars.
I got to thinking - what else did I have on hand? Milk chocolate chips? Check. Peanuts? Check. Caramel bits? Check. Sounded like Snickers to me! I stirred those into the cookie dough, spread it in the pan, topped it with what Snickers I did have and let it bake. Ooo-la-la - chewy, crunchy, deliciousness. Sometimes the best recipes come out of the blue!
*If you don't have those additional ingredients, you can certainly follow my original plan and just stir chopped Snickers into the dough.
Peanut Butter Snickers Bars 2 1/2 c. flour 1 tsp. salt 1/2 tsp. baking soda 1/2 tsp. baking powder 1 c. (2 sticks) softened butter 1 c. light brown sugar 1 c. sugar 1 c. peanut butter (we had creamy on hand, so that's what I used) 2 tsp. vanilla 2 large eggs 3/4 c. peanuts, chopped 1 c. caramel bits 1 1/2 c. milk chocolate chips 4 (or more) fun-size Snickers, chopped 1/4 c. chocolate chips (for drizzling, if desired) 1. Preheat oven to 350. Grease a 9x13 pan and set aside. 2. Beat butter with sugars until creamy - 2 minutes. Scrape down sides of bowl. 3. Add peanut butter, vanilla, eggs, baking powder, baking soda, and salt and beat again. 4. Stir in flour until almost combined. 5. Add peanuts, caramel bits, and chocolate chips, and mix until just combined. 6. Spread evenly in pan and sprinkle with chopped Snickers. Bake 25-28 minutes, or until light golden brown on top. 7. Melt 1/4 c. chocolate chips and use a fork, spoon, or plastic baggie to drizzle over the top of the bars. Allow to cool before cutting.
I don't claim to be a fitness expert, nor do I see myself as even remotely close to being one. I just like to stay active. Yes, chasing two little boys around is active, but it's not the "I-feel-all-sweaty-and-gross-but-I-actually-accomplished-something" feeling I get after doing an actual workout.
I'm trying to keep up my workout routine while I'm pregnant, and so far it's been going well. Although, the last couple weeks I've been a little more tired than usual (chalk that up to kiddos with colds/ear infections, and going back to work) so I may have been slacking a little bit.
But, the bottom line is that I feel better during the day if I can get in a little exercise in the morning. You definitely need to pick the time that works best for you. I tend to have the most energy in the morning, so I choose that time to work out. If I skip it and tell myself I'll do it during the boys' naps, or after Dusty gets home . . . Well, odds are good that it doesn't happen that day.
I don't really have a workout "routine" per se, but I regularly use these two videos:
These are both workouts I did before I was pregnant, so we'll see how long I'm able to keep doing Zumba. I find I have to modify some of the moves, but at least it's fun . . . and entertaining for anyone who happens to be watching! The nice thing about Zumba is that it includes a 20-minute workout, and also a 20-minute ab routine that's all standing up. Perfect!
Walk Away the Pounds is nice because the "Walk Strong" workout is 2 miles, but also does strength training, while the "Super Challenge" is 4 miles, and you can choose if you want to stop after 1, 2, 3, or 4 miles. Also, I used this after Aiden was born and had gotten a little older - I put him in the Baby Bjorn and walked with him in it. He loved it and often fell asleep, and the extra 10-20 pounds didn't hurt the goal of getting my body back after baby!
Anyway, the point is that I work out to help me stay positive. Weight gain is inevitable during pregnancy, and it can get depressing even though you know it's healthy for you and baby. I try to workout 5 times a week, but if that doesn't happen I try to do a minimum of 3 days. Taking the boys for a walk in the double stroller is an excellent workout, too - that extra 75-100 pounds of boys and stroller weight makes me feel like I've really worked hard . . . not to mention the added weight of the baby bump. :)
Bottom line: do what feels right for you. If you didn't work out before getting pregnant, try a walking video - it's a great workout (although it can get kind of boring if you're by yourself). Feelin' peppy? Try Zumba, or something along those lines, but above all listen to your body. Pregnancy is not the time to start working out hard-core (you don't want any pulled/strained muscles to add to your pregnancy uncomfortable-ness). But, staying active can keep your spirits lifted, help manage baby-weight gain, and build stamina for labor and delivery.
It's also nice to just do something for myself, that makes me feel good. I also think it helps me avoid the "pregnancy waddle." :) I have yet to experience it with any of my pregnancies, and hope to avoid it with this one, too.
I try not to let it get me down when I don't have the energy or can't fit in a workout - I just tell myself that at least I'm making an effort, and that's good, right?
**Again, not a fitness expert, so make sure you check with your doctor before you start any crazy exercising!**
Let me start by saying that over the years I've come to a new appreciation for sugar cookies. Maybe it's because I've come across a few truly delicious recipes that don't even need frosting to make them delicious. When I was growing up, I loved eating sugar cookie dough, but was usually left pretty un-enthused after they were baked. Not the case anymore! My favorite cut-out recipe uses cream cheese, and my favorite drop recipe uses sour cream. The addition of those simple ingredients takes them over the top and keeps you coming back to eat cookie after cookie after cookie . . .
However, this recipe is neither of those, but oh is it good! There's a little bit of cream cheese in the dough, which adds a hint of tang once they're baked up. You don't have to use the M&Ms if you don't want to; these are seriously scrumptious without. You roll the dough in sugar before baking them, which creates this thin crust of sugary goodness. Then, the inside of the cookie is so deliciously chewy as to be pretty much indescribable. One of my favorite things about these cookies is their texture - wonderful.
You could certainly roll them in colored sugar to make them more festive around Christmas, Thanksgiving, Valentine's Day, etc. Or, try mixing in different things - white chocolate chips, toffee pieces, crushed candy canes, etc. The possibilities are endless!
Cream Cheese M&M Sugar Cookies (original recipe can be found here)
2 oz. cream cheese, softened
1 1/2 c. plus 1/3 c. sugar
6 Tbls. butter, melted
1/3 c. vegetable oil
1 egg
1 Tbls. milk
2 tsp. vanilla
1 tsp. baking powder
1/2 tsp. baking soda
1/2 tsp. salt
2 1/4 c. flour
1 1/4 c. M&Ms
1. Beat cream cheese and 1 1/2 c. sugar on medium speed until light and fluffy - 3 minutes.
2. Add butter and oil and beat again on medium speed 1 minute. Scrape down bowl.
3. Add egg, milk, vanilla, baking powder, baking soda, and salt and mix until everything comes together and is smooth and creamy, 2 minutes.
4. Stir in flour until mostly combined, then stir in M&Ms until everything is just combined. Don't overmix.
5. Refrigerate dough 1-2 hours.
6. Preheat oven to 350 and roll Tbls of dough in 1/3 c. sugar. Place on greased baking sheet, flatten slightly with the bottom of a glass, and bake 10-14 minutes. Bottoms should look light golden brown.

 Eggnog Quick Bread (original recipe found here)