Showing posts with label Chocolate. Show all posts

Thursday, January 10, 2013

Hot Cocoa Cookies

I love hot chocolate. It's my winter indulgence. Of course I love fancy, flavored types, but I definitely don't turn my nose up at a Swiss Miss packet! Often, I have more cocoa on my hands than I know what to do with since I'm the only one in the house who drinks it, so I was excited to find a way to use a couple packets for something other than drinking.

For this recipe, I used a combination of these cookies and these cookies, and added a little spin of my own by rolling the cookies in hot cocoa/powdered sugar before baking. They were a hit in our household - Dusty loved them, and the boys kept asking for them . . . It probably doesn't hurt that there's half a marshmallow right on top! The cookies are soft, chewy, and fudgy and sure to please a chocolate-lover. I hope you like them as much as we do!

Hot Cocoa Cookies
1 pkg. brownie mix (dry)
1 1/4 c. flour
1/4 c. brown sugar
1/2 c. butter, melted
2 eggs
2 Tbls water
2 packets hot cocoa mix
1/4 c. powdered sugar
large marshmallows (about 10)
chocolate bars (probably 2 or 3; cut into about 1 inch pieces)
1. Mix together brownie mix, flour, sugar, butter, eggs, and water until a stiff dough forms. Refrigerate 2 hours.
2. Preheat oven to 350, and line a baking sheet with parchment paper.
3. Mix together hot cocoa mix and powdered sugar. Drop dough by heaping Tbls. into mixture and roll until covered. Place on prepared baking sheet. Bake 10 minutes.
4. Meanwhile, cut each marshmallow in half, and stick a piece of chocolate on the bottoms. When cookies come out of the oven, gently press marshmallow/chocolate into the center and continue baking 4-5 minutes.
5. Eat warm for an ooey-gooey treat, or allow to cool.


Hugs and cookies,

Amanda

Saturday, December 22, 2012

12 Days of Goodies: Day 11 - Better-Than-Mounds Bars

Usually during my Christmas baking I make chocolate dipped coconut macaroons, but this year I didn't feel like scooping out the individual cookies, baking them, then dipping them. However, my youngest brother loves those cookies, so I knew I still wanted to make something with chocolate and coconut.

These bars are easy. They are chewy. They have chocolate and coconut. They. Are. Amazingly delicious. They're one of those bars that I could keep eating and eating despite how full I feel. Dangerous, I know. But seriously, they come together so quickly and are so yummy - you won't be disappointed.

Better-Than-Mounds Bars (original recipe can be found here)
1 3/4 c. graham cracker crumbs
1/2 c. butter, melted
1/3 c. sugar
7 oz. sweetened flaked coconut
14 oz. can sweetened condensed milk
1 1/2-2 c. semi-sweet chocolate chips (depending on how chocolate-y you want them)
1 Tbls. peanut butter
1. Preheat oven to 350 degrees, line a 9x13 pan with foil, and grease it.
2. With a fork, mix together graham cracker crumbs, butter, and sugar. Evenly and firmly press into pan. Bake 10 minutes.
3. Meanwhile, stir together coconut and condensed milk. Carefully spread over baked crust, and place back in the oven to bake 15 minutes. Allow to cool.
4. Melt chocolate chips and peanut butter together, and spread over cooled bars. Place in the fridge for 1/2 an hour to set up.


Hugs and cookies,

Amanda

Tuesday, December 18, 2012

12 Days of Goodies Day 7: Peanut Butter Kiss Cookies in Reverse

One of my favorite cookies is the peanut butter cookies that are rolled in sugar and have a Hershey's kiss pressed into the center or a chocolate star. For probably the gazillionth time, I love the peanut butter and chocolate combination. These cookies were a fun twist on that traditional cookie.

The dough is chocolate with a hint of peanut butter, and originally you were supposed to form the dough around a small ball of peanut butter/powdered sugar. Well, I didn't feel like being quite that putzy with it, so I rolled the chocolate dough in sugar, baked the cookies, and when they came out of the oven I pressed my thumb into the center and filled it with the peanut butter filling. The result was delicious, and I have a feeling this will be a popular cookie with my hubby and sibs, who all seem to love chocolate/peanut butter, too!

You can always use a peanut butter kiss to press into the center, too, or any other small piece of chocolate you think would be yummy.

Chocolate Peanut Butter Surprise Cookies (original recipe can be found here)
1/2 c. butter, softened
1/2 c. sugar, plus extra for rolling
1/2 c. brown sugar
1 c. peanut butter, divided
1 tsp. vanilla
1 egg
1/2 tsp. baking soda
1/4 tsp. salt
1/2 c. unsweetened cocoa powder
1 1/2 c. flour
1/2 c. powdered sugar
2-3 Tbls. milk
1. Preheat oven to 350 degrees and line a baking sheet with parchment paper.
2. Cream together butter, both sugars, and 1/2 c. peanut butter.
3. Add vanilla, egg, baking soda, and salt, and beat again.
4. Slowly stir in cocoa powder and flour.
5. Form dough into 1 inch balls and roll in regular sugar. Flatten slightly with the bottom of a glass and bake 7-9 minutes.
6. Immediately after removing them from the oven, make an indentation in the center of the cookie with your thumb (careful, they're hot!) or the handle of a wooden spoon. Allow to cool.
7. Beat together powdered sugar, remaining 1/2 c. peanut butter, and milk until smooth. This will be thick. Pipe or spoon a blob into the center of each cookie and press slightly with your finger to make it smooth.

Hugs and cookies,

Amanda


Friday, December 14, 2012

12 Days of Goodies: Day 4 - Mint Meringue Kisses

You can't do holiday treats without including something with peppermint - it captures the season like few other flavors can. Peppermint isn't usually my favorite flavoring, but when it's mixed with chocolate it takes on a whole different flavor. 

The wonderful thing about these cookies is how absolutely light and airy they are. They're like crisp puffs of air with a light peppermint taste complemented by the light dip in chocolate. You can drizzle chocolate over the tops if you prefer, instead of dipping; and, if you don't want to pipe the meringues, you can certainly just drop them by Tbls. onto the baking sheet and they'll be just as lovely and delicious.

Mint Meringue Kisses (original recipe can be found here)
4 egg whites, at room temperature
1/2 tsp. cream of tartar
1/2 tsp. salt
1 1/3 c. sugar
1/4 tsp. peppermint extract
6-7 drops of green food coloring
1 c. semi-sweet chocolate chips
1 tsp. vegetable oil
1. Preheat oven to 225 degrees, and line 2 baking sheets with parchment paper - do not grease.
2. Combine egg whites, cream of tartar, and salt in a mixer and use the whisk attachment to whisk on high until soft peaks form, 2-3 minutes.
3. Add sugar 1 Tbls. at a time, and continue beating until stiff peaks form, another 2-3 minutes.
4. Beat in peppermint extract and food coloring.
5. Using a large star tip, pipe 1 inch stars on the parchment paper, leaving about 1 inch between each one.
6. Bake for 1 hour, turn the oven off, and leave the pans in the oven for another hour until they're cool and dry.
7. Melt together chocolate chips and vegetable oil, and drizzle over top of meringues, or dip tops in it. Allow chocolate to cool and set.


Hugs and cookies,
Amanda

Thursday, December 13, 2012

12 Days of Goodies: Day 3 - Raspberry Cheesecake Brownies

What's Christmas without a little decadence? These brownies are scrumptious, creamy, and fudgy. Yummmm. Everything's better when cream cheese is involved, and when it's mixed with chocolate and raspberry? Well, its perfect.

I made the recipe easier by using a boxed brownie mix, but feel free to use your favorite recipe! I found this recipe over at Bakers Royale.

Raspberry Cheesecake Brownies
1 box brownie mix, and ingredients called for on the box
Filling
1 8 oz. pkg cream cheese
1/3 c. sugar
1/4 c. raspberry puree or raspberry jam (I used jam)
1 egg
1/2 tsp. vanilla
1/4 tsp. salt
3 Tbls. flour
1 pt. fresh raspberries, optional
Glaze
1/4 c. raspberry jam
1/3 c. powdered sugar
1. Preheat oven to 350 degrees and line a 9x13 inch pan with parchment paper.
2. Prepare brownie batter according to package directions and pour 2/3 into prepared pan.
3. Beat all filling ingredients together (except fresh raspberries, if using) until light and fluffy, 3-4 minutes.
4. Carefully spread cream cheese filling over brownie batter, and dollop the rest of the brownie batter on top of it. Gently swirl using a knife to create a marbled effect. Press raspberries into the top, if using.
5. Bake 45 minutes, or until set. Allow to cool completely.
6. Warm raspberry jam in the microwave for 30 seconds, and whisk in powdered sugar. Drizzle over the top of the bars.

Hugs and cookies,

Amanda

Wednesday, December 12, 2012

12 Days of Goodies: Day 2 - Buttery Orange Cookies with a Chocolate Drizzle

These tender cookies are sure to be a hit on your holiday cookie tray. Unlike some cookies, these aren't overly sweet. They have a hint of orange, and the drizzle of chocolate on the top hits just the right note for sweetness and flavor combination. This was a new recipe for me this year, and it's one I'll be sure to return to and use again.

I love the combination of chocolate and orange (i.e. those chocolate oranges that you smash and then eat the segments), but if you're not a fan, feel free to leave out the orange zest and substitute almond or vanilla extract. Even peppermint extract might be a nice touch! I used milk chocolate for the drizzle, but if you like semi-sweet or bittersweet, or even white chocolate, go with it! You can adapt this cookie many different ways to suit your tastes.

Buttery Orange Cookies with a Chocolate Drizzle (recipe slightly adapted from Taste of Home Christmas Cookies 2012)
1 c. softened butter
1/2 c. powdered sugar
1 tsp. orange zest
1 tsp. orange extract
1/4 tsp. salt
2 c. flour
1/2 c. sugar
1/2-3/4 c. chocolate chips (I used milk chocolate, but you can use your favorite)
1. Preheat oven to 350 and line baking sheets with parchment paper.
2. Cream butter and powdered sugar until light and fluffy, 2-3 minutes.
3. Beat in zest, extract and salt.
4. Add flour and mix until combined - this is a stiff dough.
5. Drop dough by Tbls. onto prepared baking sheet. Dip tops of dough in sugar, and flatten slightly with the bottom of a glass.
6. Bake cookies 10-12 minutes, or just until set - they shouldn't be brown.
7. Once cookies have cooled, melt chocolate chips, and use a fork to drizzle the chocolate over the tops of the cookies. Alternately, you could dip half the cookie in chocolate, although you'll need more chocolate chips for this.
8. Place in the fridge or freezer until chocolate sets and hardens - 20-30 minutes.

Hugs and cookies,

Amanda

Wednesday, October 17, 2012

Peanut Butter Snickers Bars

Sometimes I have a great idea for a recipe and am so excited to make it that I don't check the ingredients I have on hand first. Sometimes it's a disaster. Other times, it turns into a scrumptious treat that becomes a family favorite! The latter is what happened with this recipe, thankfully.

I had a craving for those little peanut butter cookies that have a Snickers hidden on the inside, but didn't feel like going through the work of rolling each individual ball. So, I went to my go-to, all-time-favorite, Peanut Butter Cookie recipe. I thought I would just chop up the fun-size Snickers I "knew" we had on hand and stir them into the batter . . . Well, as it turned out there were only 4 left! (I have no idea how that happened - it's like we have an uncontrollable, chocolate-craving, pregnant lady in our house or something.) Clearly 4 measly little pieces would not be enough for an entire pan of bars.

I got to thinking - what else did I have on hand? Milk chocolate chips? Check. Peanuts? Check. Caramel bits? Check. Sounded like Snickers to me! I stirred those into the cookie dough, spread it in the pan, topped it with what Snickers I did have and let it bake. Ooo-la-la - chewy, crunchy, deliciousness. Sometimes the best recipes come out of the blue!
*If you don't have those additional ingredients, you can certainly follow my original plan and just stir chopped Snickers into the dough.

Peanut Butter Snickers Bars
2 1/2 c. flour
1 tsp. salt
1/2 tsp. baking soda
1/2 tsp. baking powder
1 c. (2 sticks) softened butter
1 c. light brown sugar
1 c. sugar
1 c. peanut butter (we had creamy on hand, so that's what I used)
2 tsp. vanilla
2 large eggs
3/4 c. peanuts, chopped
1 c. caramel bits
1 1/2 c. milk chocolate chips
4 (or more) fun-size Snickers, chopped
1/4 c. chocolate chips (for drizzling, if desired)
1. Preheat oven to 350. Grease a 9x13 pan and set aside.
2. Beat butter with sugars until creamy - 2 minutes. Scrape down sides of bowl.
3. Add peanut butter, vanilla, eggs, baking powder, baking soda, and salt and beat again.
4. Stir in flour until almost combined.
5. Add peanuts, caramel bits, and chocolate chips, and mix until just combined.
6. Spread evenly in pan and sprinkle with chopped Snickers. Bake 25-28 minutes, or until light golden brown on top.
7. Melt 1/4 c. chocolate chips and use a fork, spoon, or plastic baggie to drizzle over the top of the bars. Allow to cool before cutting.


Friday, September 21, 2012

Crunchers

These no-bake treats will please any palate. They're crunchy and salty from the crackers, chewy from the caramel, and sweet from the chocolate topping. You can't go wrong with a sweet-salty, chewy-crunchy treat, right? Right.

As I said, these are no-bake, so the Club crackers serve as the base, as well as some of the middle layers. You might think these wouldn't have a very long fridge life (soggy crackers, anyone?), but I can reassure you on that point. These were in our fridge at least 5 days and they were just as crunchy the day we gobbled up the last bite as the day we first tried that deliciousness. (And they only lasted that long because I made them on a Thursday and we were out of town over the weekend.)

Most of these ingredients are probably ones you have on hand, which is always a bonus - I did have to go out to buy the Club crackers; I bought the reduced fat ones and they worked perfectly for me. Seriously, if you're looking for an easy treat (it's almost like candy) you should definitely give these babies a try!

Crunchers (original recipe can be found here)
80-90 Club crackers
1 c. butter
2 c. graham cracker crumbs
1 c. brown sugar
1/3 c. sugar
1/2 c. milk
2/3 c. peanut butter
1/2 c. semi-sweet chocoalte chips
1/2 c. butterscotch chips
1. Line a 13x9 pan with foil, leaving enough overhang over the sides to lift bars out when done.
2. Place one layer of crackers evenly over the bottom of the pan - cut them if they don't fit evenly. I used 30 crackers per layer and didn't have to cut them.
3. Melt butter in a saucepan over medium heat. Add graham cracker crumbs, both sugars, and milk. Bring to a boil (while stirring), and boil for 5 minutes.
4. Remove from heat and spread half the mixture evenly over the crackers in the pan.
5. Place another layer of crackers over the caramel mixture, followed by the rest of the caramel.
6. Cover the top of the caramel with one more layer of crackers and refrigerate while making the topping.
7. Microwave peanut butter, chocolate chips, and butterscotch chips for one minute. Stir until smooth (can microwave another 30 seconds if it's not smooth). Spread over the top of the crackers and refrigerate everything for at least an hour before cutting.
* Remove bars from pan using foil handles to make cutting and removing bars easier. Store in the refrigerator.


Hugs and cookies,

Amanda

Tuesday, August 28, 2012

Candy Lover's Cake

Asher's 3rd birthday came and went, and I still can't believe he's 3! He had an absolute blast with his birthday - he was so excited about everything: cake, candles, presents, singing, seeing family, everything. In fact, today he said, "I need some more birthday, Mommy." Made me feel good to know that he really enjoyed everything about it.

For my little sweetie's actual birthday, I knew I wanted to make a cake that didn't require any fancy decorating by me, since I had already made a dinosaur birthday cake when we had family down to celebrate over the weekend (a post on that cake to come!). This cake couldn't have been easier as far as decorating goes, and the cake and frosting recipes are easy, too.

I used my favorite Hershey's Perfectly Chocolate Chocolate Cake and Perfectly Chocolate Chocolate Frosting recipes because you really can't go wrong with either - they turn out every time. I love them.

And, since Asher loves Oreos, I decided to use them in the filling between the cake layers:

Oreo Cream Filling (original recipe can be found here)
8 oz. container whipped topping
4 oz. softened cream cheese
7 oz. jar marshmallow cream
12 oreo cookies, crushed
1. Combine first three ingredients until thoroughly combined. Refrigerate about 1 hour.
2. Stir in the crushed oreos, and spread on top of first cake layer.

Additional Supplies
fun size Kit Kats (I'm not sure how many, so just grab a Halloween sized bag of them)
M&Ms
sprinkles
Assembly
1. Place a dollop of frosting on the center of your cake plate, followed by one cake layer - this keeps the cake from sliding around.
2. Spread the bottom cake layer with the oreo cream filling, leaving about a 1 inch border.
3. Place the second cake layer on top of the oreo filling, and use chocolate frosting to frost top and sides of cake. Don't worry if it doesn't look pretty, it'll be covered with candy!
4. Place Kit Kats vertically around the entire cake and press slightly to stick them to the frosting.
5. Grab some M&Ms and place them in the space between the top of the Kit Kats and the top of the cake.
6. Cover the top with sprinkles and keep in the refrigerator until you're ready to eat!

This cake screams party! And, it's so fun for kids to eat because it's covered in colorful and chocolate-y candy goodness . . . You probably won't get many complaints from the adults either. :)


Waiting patiently while we sing . . . 

Working hard to blow out those candles!


Hugs and cookies,

Amanda

Thursday, July 26, 2012

Double Chocolate Chip Banana Bread

Growing up, I remember my mom making chocolate-covered frozen bananas during the summer, and they were one of my favorite treats! I love the combination of chocolate and banana, but for some reason don't do a whole lot with it in my baking. Well, this recipe took me right back to those good ol' days, and is different enough from regular banana bread to make it a real treat.

If you're looking for a tasty twist on a traditional favorite, this recipe is definitely for you! The cocoa powder in the batter gives a hint of chocolate-y-ness, and the chocolate chips are a surprise burst of more intense chocolate flavor that help the bread stay nice and moist. But, have no fear, the chocolate doesn't overwhelm the banana flavor; it enhances it and makes that delicious combination.

I made a few changes to the recipe, so you can either follow the link to the original, or make it as I list below. I hope you enjoy this one as much as my family and I did! (I even doubled the recipe and stuck one in the freezer for later - an added bonus to making banana bread is that it freezes so well!)

Double Chocolate Chip Banana Bread (original recipe can be found here)
1 c. coconut oil (if you don't have this, feel free to sub. vegetable or canola oil)
1 c. sugar
2 eggs
2 tsp. vanilla
2 c. mashed bananas (about 4 medium)
1 c. light sour cream
1 tsp. salt
2 tsp. baking soda
4 Tbls. cocoa powder
2 c. white whole wheat flour
1/2 c. mini chocolate chips
1 c. semi-sweet chocolate chips
1. Preheat oven to 350 and grease 2 9x5 loaf pans.
2. In a large bowl, thoroughly mix together oil, sugar, eggs, vanilla, bananas, and sour cream.
3. Stir in salt, soda and cocoa powder until combined.
4. Stir in flour until just combined, followed by chocolate chips (don't overmix once you add the flour, or your bread will be tough).
5. Divide batter evenly between pans, and bake for 55-60 minutes. (1 hour was perfect for mine)
6. Let sit ten minutes in pan, then run a knife around the edges and turn loaves out onto cooling racks to cool completely. (I couldn't wait to let mine cool all the way so I dug in and ooooh was it a moist, melty treat!)


Hugs and cookies,

Amanda

Wednesday, July 18, 2012

S'mores Bars

Summer = S'mores, right? Right. These bars are great for summer because they're literally a portable, less messy s'more, and you can make them in the winter to remind you of hot summer days. (Although, I wouldn't want to be reminded of these brutally hot, unforgiving days we've been having lately!)

These were so good I made them twice within a week's time, with a slight variation. The first time, I made them with Hershey's bars as the recipe calls for, the second with Reese's PB cups. Both were delicious Mmmmm, yummy.

If When I make these again, I'll make a couple changes: 1) I would double the original recipe instead of just doing 1 1/2 times, and 2) I would use two jars of marshmallow creme instead of just one so you can really taste and see the marshmallow-y goodness! The recipe below is how I made it both times - the suggestions above would just make it a little better and/or easier, in my opinion.

I apologize that there aren't any pictures!!! Apparently they were so good that I never got any . . . If you follow the link to the original recipe, she has great pictures of what they look like. So sorry about that! I could have sworn I took some. Weird, but not surprising . . . at least for me. I had to post the recipe anyway because it really is a winner!

S'mores Bars (original recipe can be found here)
3/4 c. butter, softened
3/4 c. sugar
1/3 c. brown sugar
2 eggs
1 1/2 tsp. vanilla
2 c. + 2 Tbls. flour
1 1/4 c. graham cracker crumbs
1 1/2 tsp. baking powder
1/2 tsp. salt
6 regular Hershey's bars or 16 Reese's PB cups
1 jar of marshmallow creme
1. Preheat oven to 350 degrees and grease a 9x13 pan.
2. Beat butter, sugars, eggs, vanilla, baking powder, and salt approximately 3 minutes on medium speed.
3. Add flour and graham cracker crumbs and mix until combined.
4. Divide dough in half and spread one half in the bottom of the pan - it will be a thin layer.
5. Place the chocolate evenly over the top, then spread with marshmallow creme.
6. Take remaining dough and roll it between two pieces of waxed paper until it is a 9x13 rectangle. Peel off the top layer, then place the dough on top of marshmallow creme and gently peel off the bottom layer.
7. Bake 25-30 minutes, or until golden brown. Allow to cool before cutting . . . Or just dig in and experience gooey, delicious, s'more messiness.

Here's what kept the boys busy today . . .

 They moved literally all of their toys into their little pup tent and played in there together for about an hour! And apparently Aiden wasn't happy to be interrupted for pictures. :)


These are the times I'll remember most when they're older!

Hugs and cookies,

Amanda

Wednesday, July 04, 2012

Gourmet Style Cookies at Home

There are few things better than the fresh, big cookies from a bakery, unless you can recreate that in your own kitchen! These cookies use the same base as my favorite Chocolate Chip Cookies, but with the addition of cashews, toffee pieces, and chocolate chips, they become something truly special. I brought some to my parents' house this past weekend and heard nothing but good things, and I'm sure you will, too!

I love cashews; they're my favorite nut. But, if you're partial to something else, feel free to substitute those - pecans would be delicious in that mix of toffee and chocolate, too. Anyway, with the addition of a few special ingredients, these cookies will make you feel as though you're enjoying a special treat at an expensive bistro or bakery somewhere.

And, as it's the fourth of July today, it seemed appropriate to post a recipe for chocolate chip cookies, considering they're a staple of American life . . . at least for me. :) Hope you all have a wonderful Independence Day, celebrating our freedoms and the troops that fight for it! One nation, under God, indivisible, with liberty and justice for all.

Gourmet-Style Chocolate Chip Cookies
3 1/2 c. flour
1 tsp. baking soda
28 Tbls. butter
1 1/2 c. dark brown sugar (I use light because it's usually all I have on hand)
1 c. sugar
1 tsp. salt
1 Tbls vanilla
2 eggs
2 egg yolks
1 c. chopped cashews
3/4 c. toffee pieces
1 1/4 c. semi-sweet chocolate chips
1. Preheat oven to 375 degrees. 
2. Heat 20 Tbls. of butter over medium-high heat until melted, about 2 minutes. Continue cooking, swirling the pan continuously until butter is dark golden brown, 1 to 3 minutes. Transfer butter to large bowl and add remaining 8 Tbls. of butter and stir until melted. 
3. Add sugars, salt, soda, and vanilla and whisk until incorporated. 
4. Add egg and egg yolk and whisk until smooth. Let mixture stand 3 minutes, then whisk for 30 seconds. Repeat this twice more. 
5. Stir in flour until just incorporated, then mix in the chocolate chips, toffee pieces, and cashews. Spoon dough onto parchment-lined or greased baking sheets and bake for 10-14 minutes - the cookies should look puffy and golden brown.


I hope you all enjoy these!
Hugs and cookies,

Amanda

Friday, June 15, 2012

German Chocolate Cake Bars (One Bowl!)

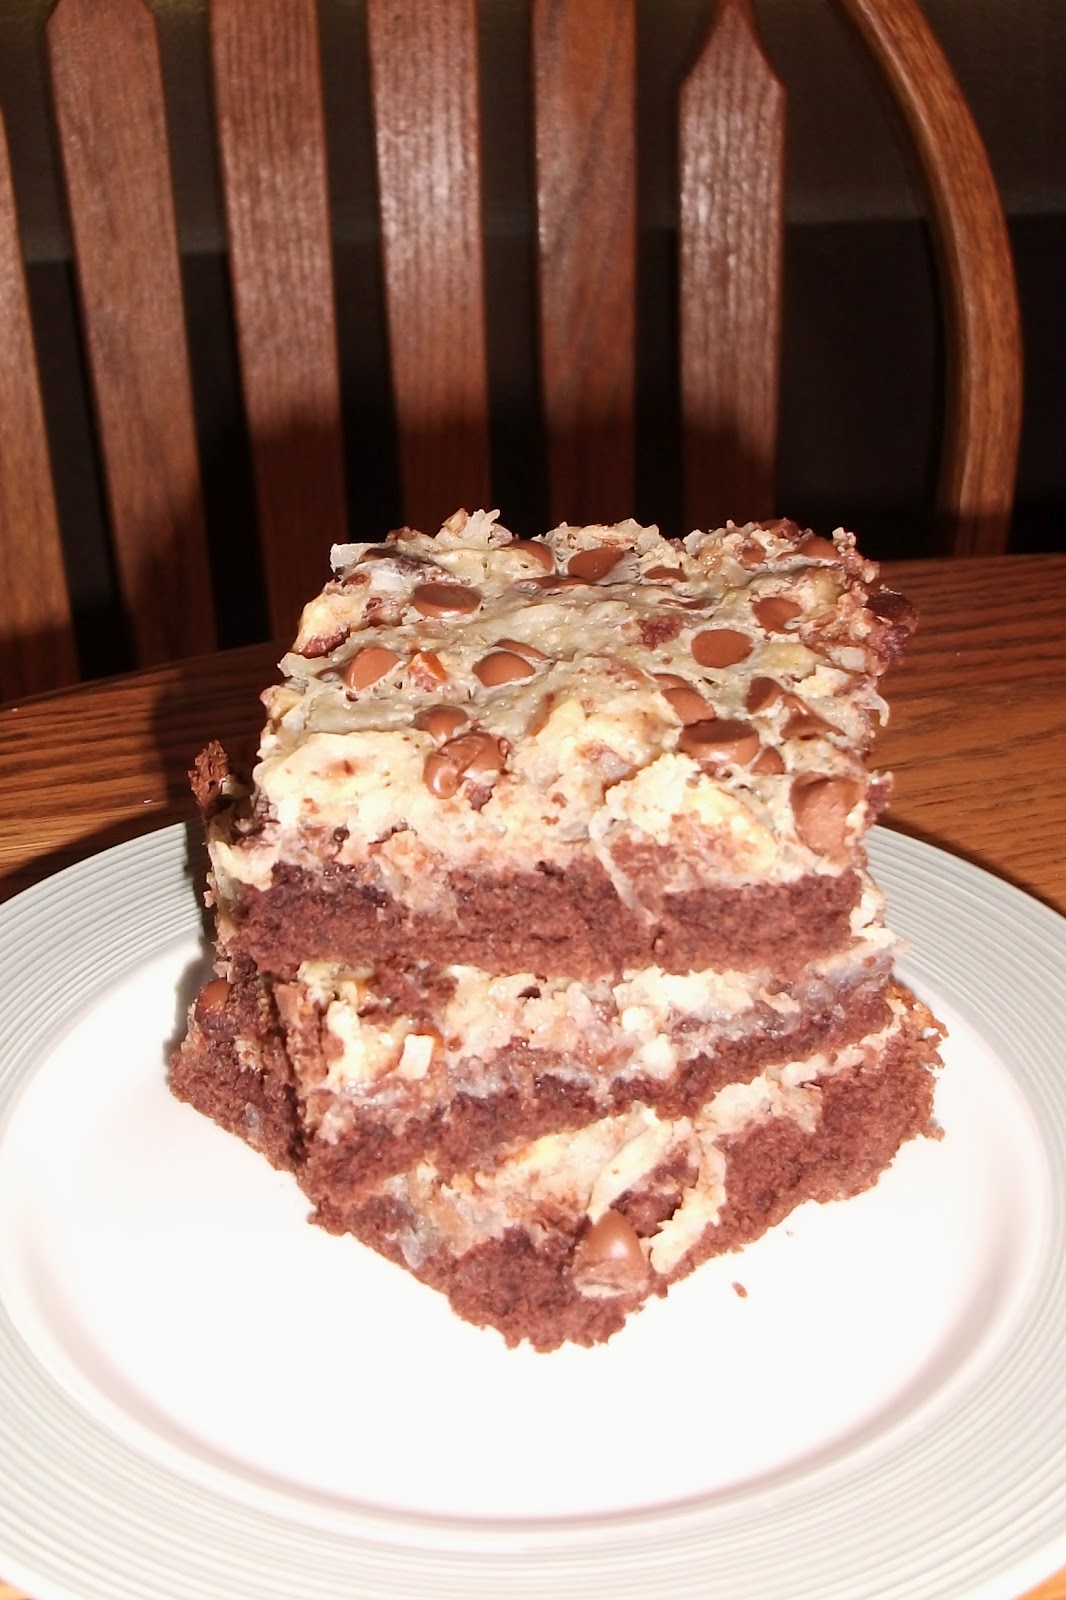
Oooh, these bars are good. I love German chocolate cake - you know, the kind with the frosting that's almost caramel-y and is loaded with coconuts and pecans all piled on top of chocolate cake? Yum.

These bars hit all the flavors of the cake, but in an easier, more portable form. You start with a cake mix as the crust, which simplifies things even more! There aren't any complicated techniques in this recipe, and the result is won-der-ful. My only tip would be not to overbake them. You don't want them to dry out on you; I recommend checking them a couple minutes before the timer goes off, and if the center looks set, but maybe slightly jiggly, go ahead and take them out.

I really don't think you'll be disappointed with these gems! Maybe they'll even please your Dad or your hubby or your grandpa on Father's Day!

German Chocolate Cake Bars (I found the recipe here)
Crust
1 pkg. devil's food cake mix
1/2 c. butter, melted
1 egg

Filling
1 14 oz. can sweetened condensed milk
1 egg
1 tsp. vanilla
1 c. sweetened coconut
1 c. chopped pecans
1/2 c. milk chocolate chips

1. Preheat oven to 350 and grease a 9x13 pan.
2. Make the crust: Combine all ingredients in a bowl until thoroughly mixed. Press into bottom of prepared pan and bake for 7 minutes.
3. While crust is baking, make the filling. Combine sweetened condensed milk, egg, vanilla, coconut, and pecans (can use the same bowl you used for the crust) until completely mixed.
4. Pour filling over warm crust and sprinkle with chocolate chips.
5. Bake 24-27 minutes. Allow to cool before cutting.


Tuesday, June 05, 2012

Cosmic Brownies - Little Debbie Style

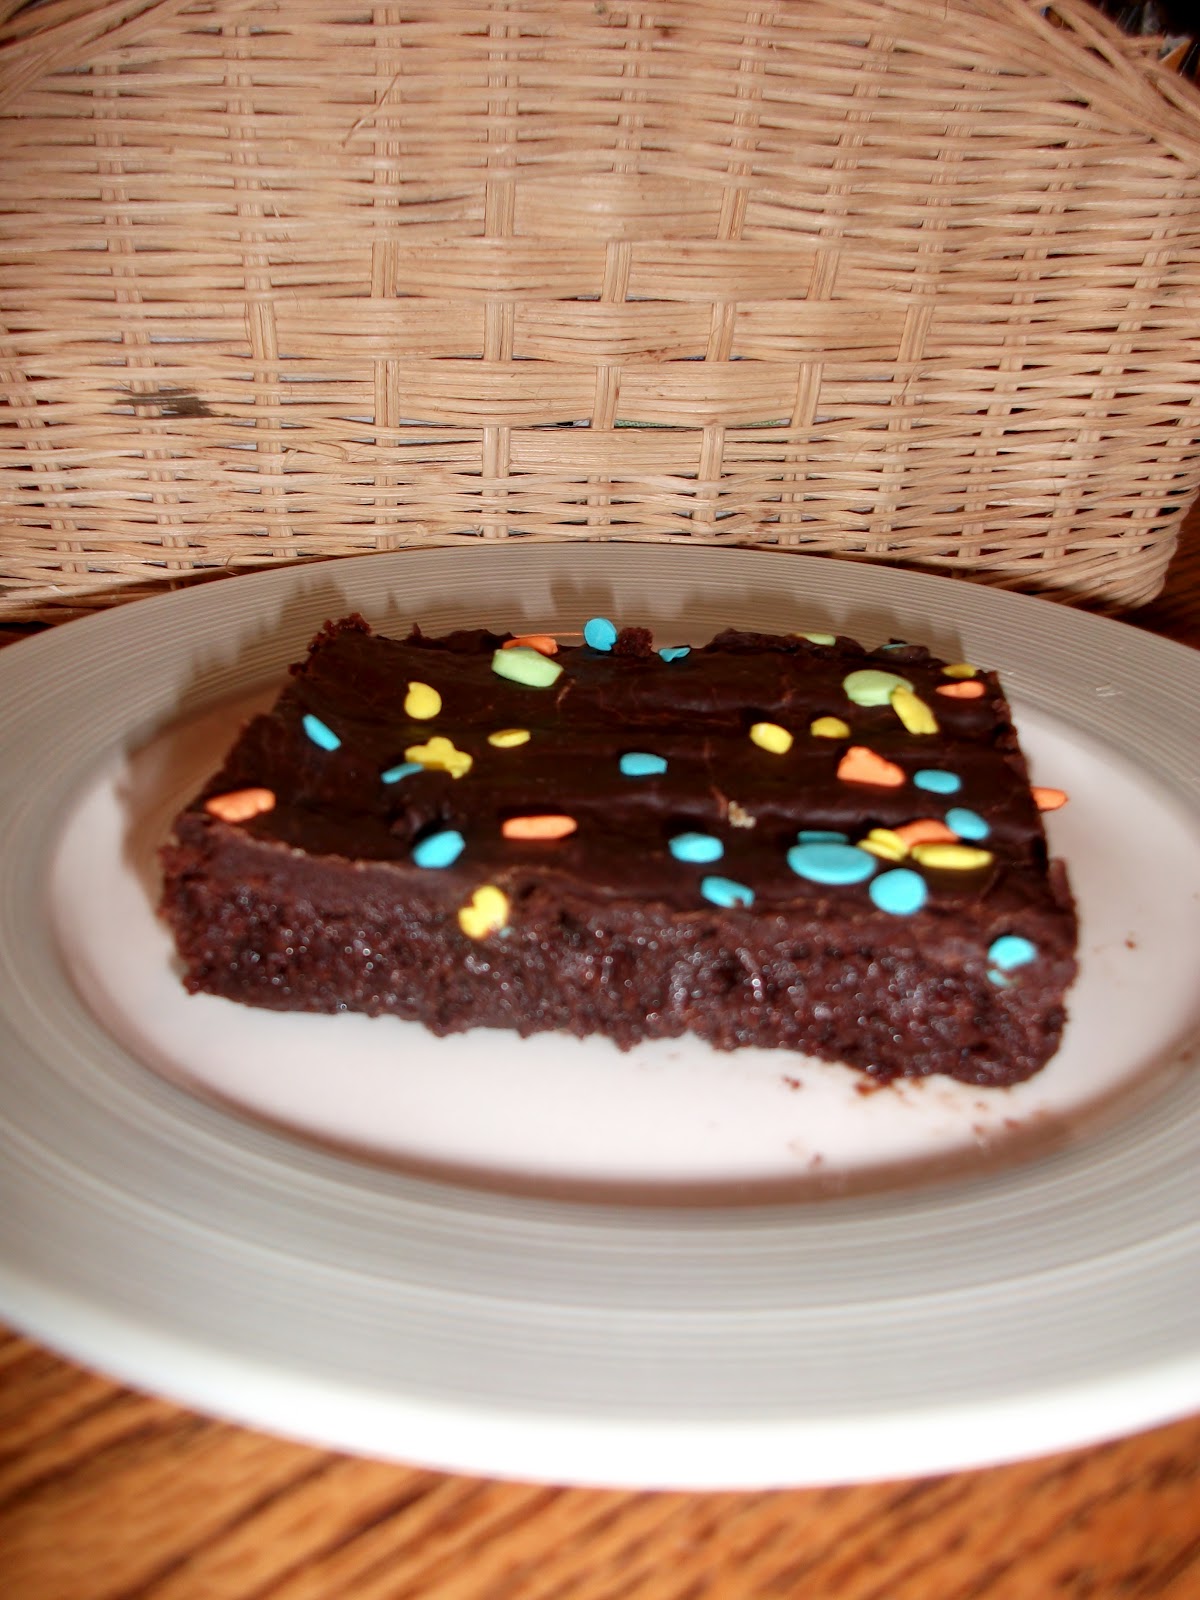
Don't you just love the Little Debbie Cosmic Brownies? I remember being able to go to the store when I was younger and getting an individual pack for $.25! Isn't that unreal? They're so dense, chewy, and chocolate-y, and none of the brownie recipes I've tried have come close to having that consistency. Until now. This recipe is golden. It is by far the fudgiest brownie I've ever made. I also love that the recipe calls for cocoa powder and not unsweetened chocolate squares as many brownie recipes do. I always have cocoa powder, but it's pretty rare that I'll stock unsweetened chocolate . . . I'm not sure why that is.

These came out so similar to the Little Debbie ones that I've loved since before I can remember, so I know I'll definitely be making them again. The frosting is a simple ganache (cream/milk and chocolate), and the original called for bittersweet chocolate. I only had semi-sweet chocolate chips, so I used those and it turned out great; next time I might use all or half milk chocolate chips because I usually like my frosting a tad sweeter. Any way you frost it, it'll be good - if you have a brownie frosting that you love use it!

This brownie base is really amazing and I think it might end up being my go-to scratch brownie recipe from now on. I hope you enjoy these as much as I did!

Cosmic Brownies (original can be found here)
Brownies
1 c. sugar
2/3 c. brown sugar
3/4 c. butter, melted
2 Tbls. water
2 eggs
2 tsp. vanilla
1 1/3 c. flour
3/4 c. cocoa powder
1/2 tsp. baking powder
1/2 tsp. salt
1. Preheat oven to 350, and line a 9x13 pan with parchment paper and spray lightly with nonstick spray.
2. Whisk together sugar, brown sugar, butter, water, eggs, and vanilla.
3. Slowly whisk in cocoa, baking powder, and salt. Fold in flour until just combined.
4. Spread into prepared pan and bake 18-20 minutes. Don't overbake these. Allow to cool.
Ganache
1/2 c. heavy cream (I used whole milk and it worked well)
7 oz. semi-sweet chocolate chips
pinch of salt
sprinkles, if desired
1. Pour chocolate into a bowl and set aside.
2. In a small pan, bring milk or cream just to a simmer (bubbles around the edges of the pan). Pour over chocolate and allow to sit for 1-2 minutes.
3. Add salt, and gently stir everything together with a spatula until it's smooth. Spread over prepared brownies and refrigerate about 1 hour so the ganache can set.


Hugs and cookies,

Amanda